


A fasciotomy is a surgical procedure in which the surgeon makes incisions on the fascia which is a sheath-like tissue that surrounds many of the muscles, blood vessels and nerves in the body. It is most used in cases such as compartment syndrome in which pressure in a muscle compartment decreases blood flow, nerve function, or tissue quality.
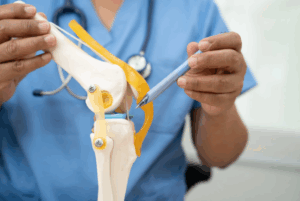
Basic Surgical Instruments
Scalpel and blades
Hemostats and forceps
Mosquito or Kelly clamps
Scissors
Retractors
Needle holders
Sutures and needles
Electrocautery device
Sterile drapes and towels
Suction device
Dressing materials
Patient preparation
Informed Consent: Discuss the advantage, disadvantages and risks with the patient or their representative.
Obtain informed consent.
Preoperative Assessment: Examine the concerned limb for features of compartment syndrome including severe pain, swelling, Paraesthesia, Pallor, Pulselessness, Paralysis.
Use Doppler ultrasound or other imaging where needed to document the vascular situation.
Check on important lab test results as well as medical co morbidities that may predispose the patient to bleeding.
Antibiotic Prophylaxis: Give suitable antibiotics to prevent infection as usual the first choice is a first-generation cephalosporin if contraindicated.
Anesthesia: Local infiltration and regional blockade may be applied or general anaesthesia depending on the patient’s status and location of the fasciotomy.
Marking the Surgical Site:
Surgical site marking
Clearly mark the affected compartment(s) and the planned incision lines on the skin.
Consider using Doppler or surface landmarks to avoid critical neurovascular structures.
Sterilization:
Prepare the limb with antiseptic solution (e.g., chlorhexidine or iodine-based solutions).
Drape the surgical field to maintain sterility.
Patient Positioning
Elevation of the Limb: Limb elevation may alleviate the venous stasis without causing decreased perfusion of arteries. Do not over elevate in severe compartment syndrome.
Specific Positions by Limb: Upper Extremity (Forearm or Hand Fasciotomy):
Place the patient supine with the arm on an armboard, slightly abducted.
Ensure the hand is supinated or in a neutral position depending on the compartment being addressed.
Lower Extremity (Leg Fasciotomy): Place the patient in supine position with leg slightly in external rotation. Employ a bolster or any type of cushion under the knee if you must shift your body most of the time.
Foot Fasciotomy: Position patient as prone with support to the involved leg and the dorsal aspect of the foot positioned flat or at right angle to the tile.
Single-Incision Fasciotomy of the Leg
Step 1-Skin Incision:
Landmark Identification: Identify the lateral border of the tibia and fibula. The incision is typically made laterally between these bony landmarks.
Step 2-Incision Placement:
Make a single longitudinal incision approximately 15-20 cm long.
Start at the fibular head and extend distally, staying lateral to avoid the tibial crest and saphenous vein.
Step 3-Superficial Dissection:
Carefully dissect through subcutaneous tissue to expose the fascia overlying the lateral compartment.
Identify and avoid superficial structures like the peroneal nerve near the fibular neck.
Step 4-Fascial Release:
Lateral Compartment:
Make a longitudinal incision in the fascia of the lateral compartment.
Ensure complete release of the lateral compartment by extending the fascial incision both proximally and distally.
Anterior Compartment:
Mobilize the tissues anteriorly to locate the anterior compartment fascia.
Make a separate longitudinal incision in the anterior fascia, ensuring complete decompression.
Step 5-Inspection:
Inspect the muscle bellies in both compartments for viability (healthy muscles are red, contractile, and bleed when incised).
If muscle is necrotic, consider debridement or further evaluation.
Step 6-Closure or Coverage:
Leave the incision open initially, as swelling from compartment syndrome may persist.
Use a sterile dressing or a negative pressure wound therapy (NPWT) device to cover the wound temporarily.
Step 1-Incision Planning:
Two incisions are made over the leg usually one in the anterior compartment and one in the posterior or deep posterior compartment.
The incisions should be placed along the natural skin lines, and the surgeon must ensure they cover the entire muscle compartments affected by the elevated pressure.
Step 2-First Incision (Anterior Compartment):
The first incision is typically made over the anterior tibial compartment (shin area), between the tibia and the fibula.
The fascia (the tough connective tissue surrounding the muscles) is carefully cut to release the pressure within the compartment.
The incision should extend from the knee to the ankle, if needed, to fully decompress the compartment.
Step 3-Second Incision (Posterior or Deep Posterior Compartment):
The second incision is made over the posterior or deep posterior compartment, which may be along the medial side of the leg.
This compartment contains muscles like the flexor muscles and the deep posterior tibial artery and nerve.
After cutting through the fascia in this region, there is significant relief of pressure and restoration of circulation.
Step 4-Muscle Release and Inspection:
After making the fascial incisions, the surgeon may inspect the muscles to ensure there is no permanent damage.
Excessive muscle swelling or necrosis may require further intervention.
Step 5-Postoperative Care:
The incisions are typically left open for a period to allow continued decompression.
Wound care includes dressing changes, and the patient may need to be monitored for signs of infection.
Step 1-Incision Planning:
The incision is planned based on the compartment(s) affected. The forearm contains three compartments:
Volar compartment (flexor compartment): Located on the front of the forearm.
Dorsal compartment (extensor compartment): Located on the back of the forearm.
Mobile wad of the forearm: Located laterally.
An incision is typically made along the longitudinal axis of the affected compartment.
Step 2-Making the Incision:
Volar approach: For the flexor compartment, the incision is made along the midline of the volar surface of the forearm, avoiding important structures like the median nerve and radial artery.
Dorsal approach: For the extensor compartment, the incision is made on the dorsal (back) surface, carefully separating the skin from the underlying muscle.
Lateral incision: In some cases, a lateral incision may be made for the mobile wad compartment.
The incisions should be long enough to allow the fascia to be fully released and to avoid re-closure under tension.
Step 3-Fascia Release:
The fascia is carefully incised using a scalpel or electrocautery along the entire length of the affected compartment(s).
For the flexor compartment, the incision is made to expose the flexor muscles. The fascia is released, and care is taken to avoid injuring the median nerve or other structures.
For the extensor compartment, the fascia is released while preserving the tendons and muscles.
Step 4-Inspecting and Decompressing the Compartment:
Once the fascia is incised, the compartment is inspected for signs of muscle and nerve damage.
Bleeding is controlled, and the muscle is allowed to decompress. If there is significant swelling, the compartment should visibly expand after fascia release.
Step 5-Post-operative Care:
The incisions are usually left open initially to allow for further swelling and decompression, particularly in acute cases.
A sterile dressing is applied, and the forearm may be placed in a splint or bandage to support the arm.
LEARNING & CME
View All
Advanced
Cardiovascular
Life Support

Basic Life
Support

Pediatric
Advanced Life
Support

Neonatal
Resuscitation
Program

Annual Stroke
Center
Continuing
Education

Opioid and Pain
Management

National
Institutes of
Health Stroke
Scale

Basics of
Electrocardiography